Working through the book Beginning WF: Windows Workflow in .NET 4.0 by Mark J. Collins, there came a point where the next step is to add an “Add” activity to the workflow (Chapter 4 for those interested). The method given is to make changes directly to the XAML of the Workflow designer, and it would then appear within the designer when switching out of code mode.
Unfortunately, I had a typo somewhere which my brain couldn’t reconcile immediately at this late hour, and took me thirty (30!) minutes and two re-types to get right. It didn’t help that there was no IntelliSense provided from within the XML editor, as I am accustomed to having with typical XAML code when doing WPF or Silverlight development.
I figured knew that there had to be a better way to do this directly from the designer, even if Microsoft didn’t provide one out of the box. Here is what I came up with, which is rather simple all things considered.
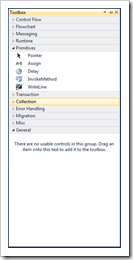
- Bring up the “Toolbox” window. If the toolbox window isn’t visible, show it by going through the menu with “View Toolbox” or the Ctrl+W, X keyboard shortcut.

- Right-click anywhere in the toolbox window and select the “Add Tab” option.
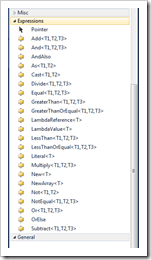
- Give the new toolbox tab a name of your choice. I chose “Expressions” since we will be adding items from the “System.Activities.Expressions” namespace. 
- Check the box next to each item to add. Note in my above screenshot, I have entered “Expressions” (sans quotes) in the “Filter” box, to filter the choices down to only the items which have Expressions in either the name or namespace.
- When you’re done, click ok the “OK” button.
- You will now see the items you’ve selected appear in the tab you created in steps 2 & 3.

From this point on, you can drag and drop the expressions directly into the designer, no more hand-coding any XAML unless you’re hell-bent on it!
Hope this is as helpful to you as it would have been, still is and will be to me.
Cheers!